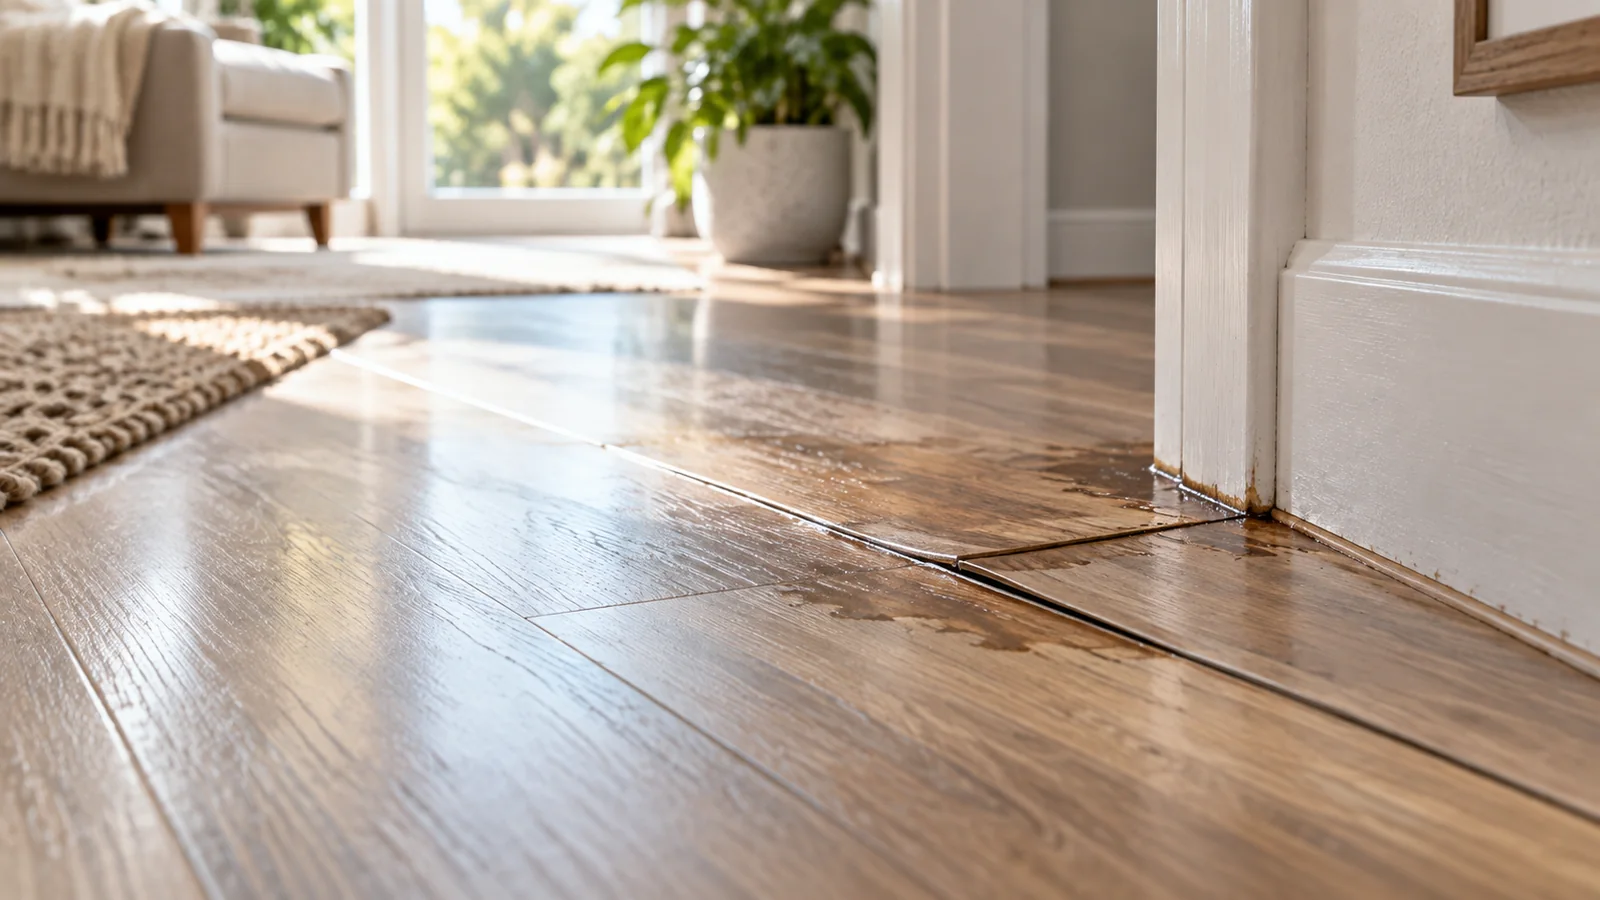
Water damage in laminate flooring is different from a surface spill. The decorative top layer can look normal while the fiberboard core at a joint has already absorbed moisture. Once that core swells, cleaning cannot shrink it back to its original dimensions. The purpose of an assessment is therefore to separate a wet-but-intact floor from permanent edge or core damage.
Stop the water source first
Before evaluating the planks, stop the leak, appliance overflow or repeated wet-cleaning source. Remove standing water promptly without flooding neighboring seams. If water may have traveled under the flooring from a plumbing event, the visible top surface may underestimate the affected area.
Look for changes at joints and edges
Inspect the floor in side light. Early signs include raised edges, a ridge along a seam, darkening at a joint, bubbling, a soft feel underfoot or a plank that no longer sits flat. Compare suspect seams with dry areas farther away. Run a fingertip across the joint rather than pressing hard on a swollen edge.
A moisture meter can be useful when interpreted for the flooring system and substrate, but a single number does not by itself prove whether a plank is reusable. Installation method, underlayment and the material below the laminate all affect drying.
Dry the area without forcing heat into it
Use normal room ventilation, fans and dehumidification as appropriate for the water event. Avoid concentrated heaters or hair dryers on one spot; rapid uneven heating can distort materials and does not address moisture trapped below the floor. If the water came from a contaminated source or has reached wall cavities, underlayment or structural materials, treat the situation as a broader water-damage issue rather than a cosmetic flooring problem.
How to tell whether replacement is likely
Laminate that has only been briefly wet at the surface may recover after prompt drying if water did not enter the joints. Planks with persistent swelling, delamination, lifted edges or a softened core are physically changed. Once fully dry, those defects are repair or replacement decisions, not stains to clean away.
- Document the affected area before drying.
- Stop the source and remove free water.
- Dry the room and monitor the joints.
- Recheck after the floor has had time to stabilize.
- Replace or professionally assess planks that remain swollen, loose or deformed.
Do not sand or flatten swollen seams
Sanding a raised laminate edge removes the protective top layer and does not restore the swollen core. Heavy weights can also damage locking joints or force moisture elsewhere. Avoid applying coatings or sealers over a still-wet problem; they can hide symptoms without correcting trapped moisture.
When professional assessment makes sense
Escalate when water was present for an extended period, covers a large area, came from a dishwasher or plumbing leak, or may have reached the subfloor. Odor, staining at baseboards or repeated movement underfoot are additional reasons to investigate below the visible surface. The Damage vs Dirt guide can help explain why a swollen edge is not a cleaning issue.
Prevention
Use damp rather than wet routine cleaning, wipe spills promptly, and pay attention to appliance connections and exterior doors where water can reach seams. Manufacturer care guidance should control how much moisture is used on a specific laminate product. For other flooring symptoms, start with the Fix Finder.
Before you start: set a safe baseline
Before you start on suspected water damage affecting a laminate flooring, clear the area, remove loose grit or debris, and identify the exact product or finish if that information is available. The important vulnerability here is the decorative wear surface may look intact while the fiberboard core swells permanently after moisture enters an edge or joint. Photograph the mark in dry, even light before treatment so you can compare the same area later instead of relying on memory. If the installation includes another material at an edge, seam, joint or trim piece, treat the least tolerant nearby material as part of the decision.
Use separate clean cloths for the cleaning pass, the rinse pass and final drying. That sounds simple, but it prevents loosened soil or dissolved residue from being rubbed back over the surface. Keep the work area small enough that you can control contact time and rinse completely. When a product label or manufacturer care sheet gives a dilution, dwell time or prohibited chemistry, that instruction takes priority over a generic household-cleaning shortcut.
Identify what the mark is telling you
For this specific problem, a useful diagnostic clue is that surface water that dries without edge change is different from raised seams, peaking, soft edges, persistent odor or plank distortion that points to moisture in the core or below the floor. Make that distinction before escalating. A cleaner can remove contamination, but it cannot rebuild missing coating, restore swollen core material or reverse a physical scratch. Conversely, treating removable transfer as permanent damage can lead to unnecessary repair. Use touch, side lighting and a small controlled cleaning test to separate residue from actual surface change.
Re-check the area only after it is rinsed and fully dry. Water and cleaner film can temporarily hide dullness or make a patch look darker. If the surface looks different only while wet, give it time to dry before deciding the first method failed. If the difference remains dry, note whether it is color, texture, gloss or shape; each points toward a different next decision.
Use an escalation ladder, not a single aggressive attempt
The preferred starting point is stop the water source, dry the surface, document the affected area, and inspect seams, transitions and nearby walls before deciding whether cleaning or replacement is the real next step. The goal of the first pass is not to force a perfect cosmetic result; it is to learn how the laminate flooring responds while using the lowest-risk effective option. Keep pressure, chemistry and contact time controlled, then rinse and inspect. A small improvement tells you more than an aggressive one-pass treatment that may also alter the finish.
If the first pass helps but does not finish the job, the next escalation should be deliberate: monitor dimensions and appearance after drying, check for ongoing moisture from plumbing or subfloor sources, and involve a flooring or water-damage professional when hidden moisture or widespread swelling is possible. Change only one variable at a time. For example, do not simultaneously switch to a stronger chemical, increase dwell time and add abrasive pressure, because you will not know which factor caused improvement or damage. Short cycles with inspection between them are easier to stop at the right point.
Troubleshooting an uneven result
If one part of the mark clears faster than another, do not automatically concentrate more pressure on the stubborn center. Uneven deposits often reflect differences in thickness, contact time, texture or exposure rather than a need for harsher cleaning. Feather the method across the boundary and keep the cleaned patch visually consistent with the surrounding floor. When the surrounding area is generally soiled, cleaning only a tiny spot can also create an apparent “bright patch” even though the surface itself was not changed.
Pay attention to edges and transitions. Many failures happen not on the broad face of a material but where liquid reaches a seam, exposed edge, grout line, caulk joint or neighboring finish. Keep the treatment where it belongs and remove excess promptly. If the problem sits directly on a vulnerable joint, a slower hand-cleaning approach is safer than flooding the area to save time.
What to avoid on this surface
For laminate flooring, avoid trying to flatten swollen plank edges with heavy weights, adding heat that can distort the floor, flooding the area with cleaner, or sealing damp material before the moisture source is resolved. Also avoid combining products unless the manufacturers explicitly say they are compatible. Stronger chemistry is not automatically a stronger solution, and added abrasion can permanently change gloss or texture even when the stain, scale or residue disappears. If a method is not described for the material or its finish, test it outside the visible area or do not use it.
When to stop
When to stop is part of the repair plan, not an admission that cleaning failed. Stop further escalation when edges stay raised after drying, the core is soft or crumbly, planks separate or buckle, moisture returns, or the affected area extends beyond what can be confidently inspected. At that point, more cleaning is unlikely to restore the original appearance and may enlarge the affected area. Reclassify the issue as possible finish change, wear, physical damage or an installation problem and move to repair, replacement or professional assessment as appropriate.
If you cannot confidently tell whether the remaining mark is removable contamination, use the Damage vs Dirt diagnostic before continuing. That check is especially useful after the tactile residue is gone but a color or sheen difference remains. For a route that combines the exact problem and material, the Fix Finder provides the corresponding SurfaceFixLab path.
Prevent the same problem from becoming a repeat repair
Prevention for this case is practical: wipe spills quickly, protect sink and appliance zones, correct leaks early, and keep wet mopping within the flooring maker’s moisture limits. The best maintenance routine reduces the frequency with which the surface needs concentrated spot treatment. That protects the finish, keeps seams and adjoining materials drier, and makes future marks easier to diagnose because the surrounding surface is already in a known clean condition.
Reference set verified 2026-09-16. Manufacturer/material-owner guidance prioritized; exact model and finish instructions take precedence.