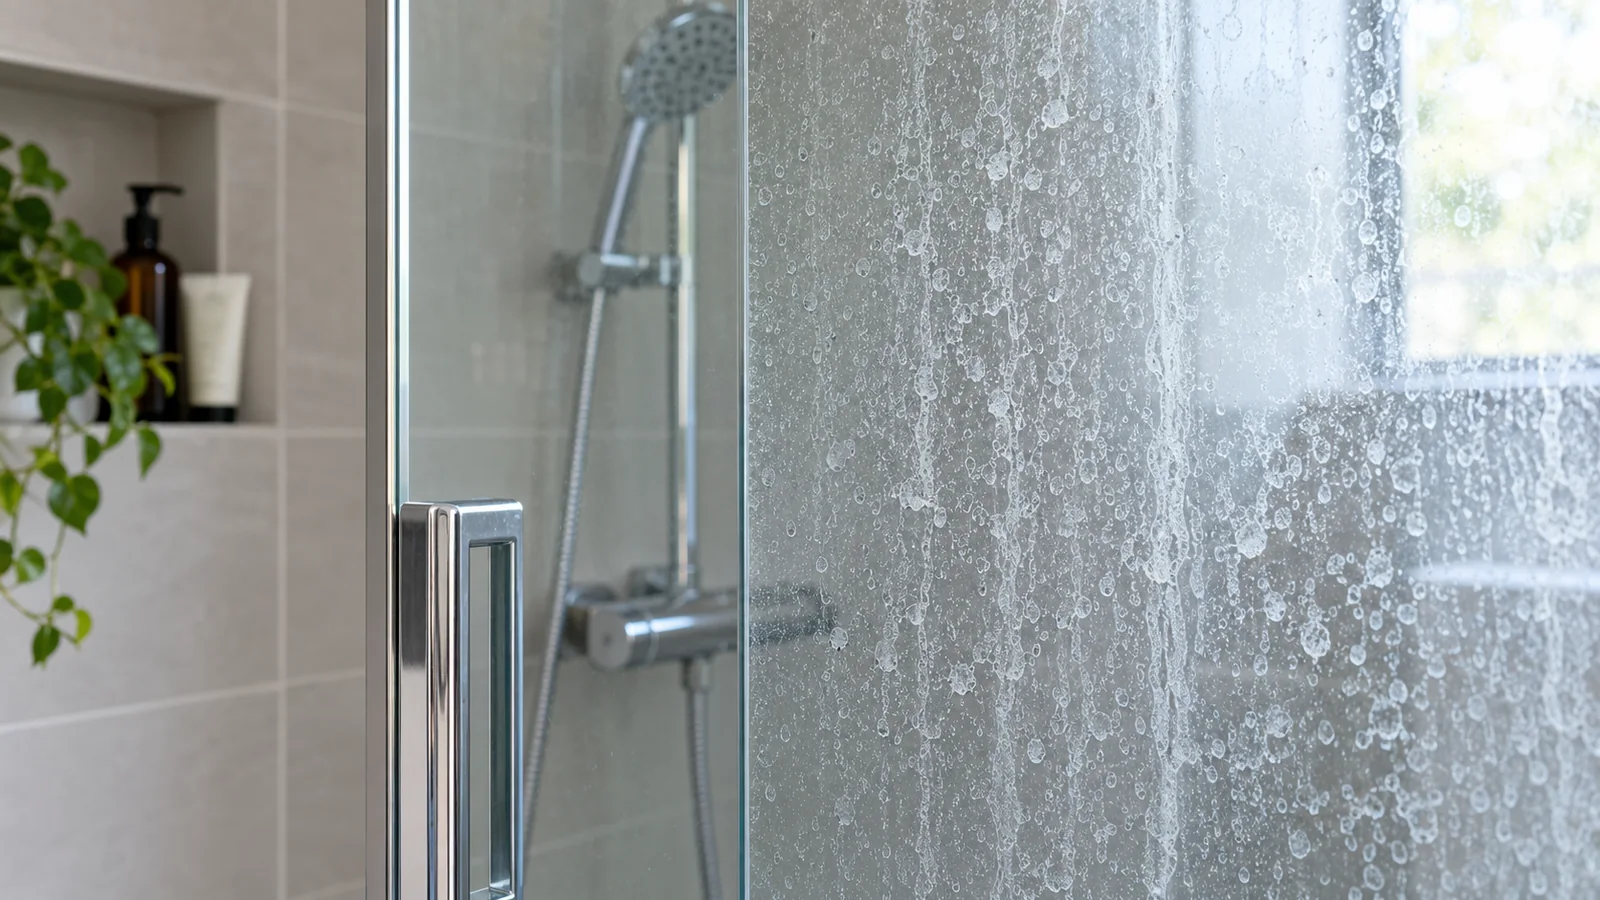
Water spots on a glass shower door are deposits left as droplets dry, but their severity depends on water chemistry, cleaning history and whether the glass has a protective coating. Light spots can often be removed with a manufacturer-approved cleaner; heavy scale may need a dedicated mineral treatment. The first task is to confirm that the marks are deposits rather than etched glass or soap film.
Before you start: distinguish deposits from etched glass
Before you start, clean a small test patch with mild soap and water, dry it completely, and inspect the mark under angled light. Raised or chalky residue is more consistent with mineral buildup; a smooth cloudy patch that remains after deposits are gone may be etched or permanently altered. Check for factory coatings and protect adjacent metal, silicone and stone before stronger mineral-removal steps. Stop if the test area becomes hazier or develops a different sheen.
Inspect a freshly rinsed and dried test area
Rinse one small section, dry it with a clean microfiber cloth and view it from the side. Discrete white dots or droplet outlines point toward mineral spotting. A greasy smear suggests soap residue. A uniform haze that does not feel rough may indicate etching or coating change. This dry inspection prevents you from repeatedly treating permanent damage as removable scale.
Check for a glass coating before descaling
Many shower doors are sold with easy-clean or hydrophobic surface treatments. Those coatings may have restricted cleaner lists. Look up the door model or coating instructions before using vinegar, acidic descaler or abrasive products. A treatment that removes scale from plain glass can shorten the life of a protective coating.
Start with the least aggressive approved cleaner
Use the enclosure manufacturer’s routine cleaner or a mild glass-safe product first. Apply with a soft cloth, allow only the recommended contact time, rinse and dry. If the spots become lighter but remain visible, repeat a controlled cycle rather than moving immediately to scrubbing powder or a hard pad.
Escalate only for confirmed mineral deposits
If the glass is uncoated or the manufacturer permits a mineral remover, use the approved product on a limited section. Keep it from running onto natural stone, metal trim or sealant that may have different chemical limits. Work top to bottom and rinse promptly. Stronger chemistry should be a targeted response to scale, not the default way to clean the whole enclosure.
Why rubbing harder can make the result worse
Mineral crust can feel rough, but pressure is not a substitute for appropriate chemistry. Abrasive pads can create fine scratches or dull a coating, especially when mineral particles become trapped beneath the pad. If a deposit is not responding, reassess contact time and product compatibility instead of increasing friction without a plan.
Tell water spots from etched glass
Removable scale changes during cleaning: edges soften, roughness decreases or residue transfers. Etching stays in the same place after the glass is clean. If a smooth pale mark remains after approved descaling, stop. Use Damage vs Dirt to decide whether the remaining appearance is physical change rather than contamination.
Protect adjacent materials
Shower doors rarely exist in isolation. Acidic runoff can affect grout, natural stone, plated hardware or dark faucet finishes. Put product on the cloth when working near edges and wipe accidental drips promptly according to the adjacent material’s care guidance. Do not let a glass-cleaning task create a new stain on the threshold.
When to stop
Stop when the glass feels clean and additional approved treatment no longer changes the dry mark. Stop sooner if coating appearance changes, metal discolors or sealant becomes soft. A remaining smooth ghost may require restoration rather than cleaning. Repeated cycles after the deposit is gone only increase the chance of surface damage.
Prevent the next round of spotting
Squeegee the door after showering so fewer droplets evaporate on the panel. Improve ventilation and leave the enclosure open enough to dry when appropriate. A quick weekly maintenance clean is gentler than waiting for dense scale to accumulate. In very hard-water areas, the frequency of drying matters more than using a stronger product occasionally.
Separate water spots from soap scum
Soap residue and mineral deposits can overlap. If a mineral cleaner seems ineffective on a greasy film, remove the soap component first with a compatible method. Conversely, ordinary glass cleaner may leave stubborn chalky spots untouched because the problem is mineral. Matching the method to the layer reduces unnecessary product use.
Use a specific route for nearby shower problems
Hard-water stains, soap scum, silicone residue and general shower-glass cleaning each have different limits. Use the Fix Finder to route by problem and surface instead of treating every cloudy mark as the same job.
Judge success after full drying
Water itself can temporarily hide haze, so do not assess the panel while wet. Dry with a lint-free cloth, wait for edge channels to stop dripping and inspect in consistent light. If the panel is clear and even, return to maintenance rather than adding polish or another treatment.
Map where spots form most heavily
Spotting concentrated along the lower half of the door, beneath a showerhead spray path or near a leaky seal can reveal why deposits return. That pattern helps you focus prevention. If one narrow area repeatedly accumulates scale, correcting the spray direction, drip path or drying routine may reduce recurrence more effectively than treating the entire panel more often.
Use clean tools during mineral removal
A microfiber cloth that has previously been used with oily cleaners or abrasive household jobs can leave film or grit on glass. Use dedicated clean cloths and rinse them thoroughly. Replace a pad when it becomes loaded with loosened mineral particles instead of continuing to rub those particles across the surface.
Do not judge coated glass by water beading alone
Hydrophobic behavior can change as a coating ages or becomes contaminated, but poor beading does not automatically mean the coating is gone. Clean according to the coating maker’s method and evaluate clarity, feel and water behavior together. Avoid applying an aftermarket treatment on top of a factory coating unless compatibility is documented.
Keep descaler contact time measurable
Use a timer when a product specifies dwell time, especially on vertical glass where it is easy to reapply repeatedly as solution runs down. More time is not always more effective, and dried descaler residue can create its own haze. Treat a defined section, rinse it completely, dry it, and compare before repeating elsewhere.
Know when restoration is a separate service
Severely etched glass may sometimes be polished or restored by specialists, but that is a different process from household descaling. If clean glass remains visibly frosted or pitted, record the condition and stop chemistry-based cleaning. Replacement or professional restoration can be more appropriate than repeated acid or abrasive experiments.
Use photos to track slow improvement
Heavy mineral deposits may improve over several controlled sessions rather than in one dramatic pass. Take a photo of the same dry section in similar lighting before and after treatment. That makes small changes easier to judge and prevents unnecessary escalation when the method is working gradually. It also shows when progress has stopped and the remaining haze is likely permanent.
Keep ventilation part of the prevention plan
Running the bathroom exhaust fan and allowing the enclosure to dry can reduce the time droplets remain on the glass. Ventilation does not remove minerals from water, but faster drying routines combined with squeegeeing reduce the volume left behind on the panel and help limit soap-film buildup.
Keep a dedicated shower-glass cloth
Using one clean microfiber cloth only for shower glass reduces the chance of transferring kitchen grease, polish or abrasive particles from other chores. Wash it without fabric softener so it remains absorbent and leaves less film.
Reference set verified 2026-09-16. Manufacturer/material-owner guidance prioritized; exact model, finish and product instructions take precedence.